
Final animation:
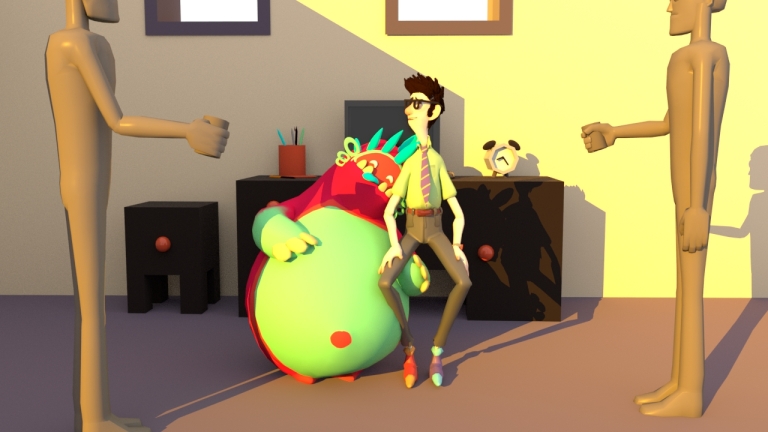
I’ve decided to make a 15 second long animation about a man who is late for work and his “pet” is causing him some…problems. Heavy problems. Literally.
Style and colour research:


Character designs:
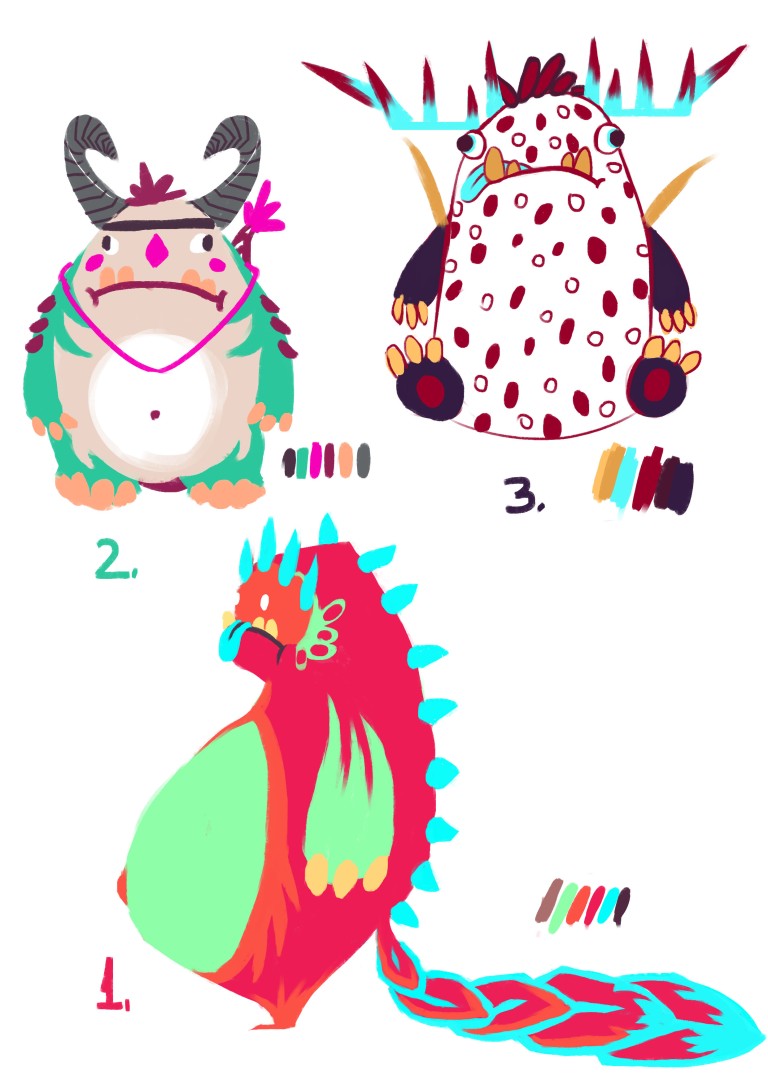


I decided to go with the first design because it looked more cartoony, and he had a more appealing look.
Scale:

After few discussions I realized my characters didn’t have enough definition, enough drive and personality. So I went in deeper and developed everything further.
The boy:
Finally got his first job, he’s been living with his parents his whole life and today is his big day to show that he’s grown up and has become a responsible adult. He’s below average at school, no real passion or hobbies. Even worse, he’s got a bald spot already. At 20 years already! He’s very shy and awkward, skinny and with no expectations from life. Not his parents though. They pressure him into moving out, finding a job and a girlfriend. Steve wants to make his parents proud of course, so he’s going to give his best today, on his first day at a boring office job. He has a small problem though. He’s late. On top of that, he’s got a bigger problem. Bob. His pet. His 600 pound pet.
Now, Bob is not a regular pet. Some people keep cats, dogs…Steve keeps something a bit more..different. Bob is a monster. A monster that Steve stumbled upon few months ago and can’t get rid of. Unfortunately, Bob isn’t the most graceful monster that could’ve come his way. But he loves Steve. Very much. To the point where he won’t let Steve leave anywhere, any time. So imagine the horror Bob faces when Steve wants to leave for work.
I decided that my male character looked too sure of himself, and not awkward enough. So I did a few adjustments:

Still not dorky enough..

Better!
Character sheets:
Steve:

Bob:

Get to know Bob a bit better:

And now Steve:

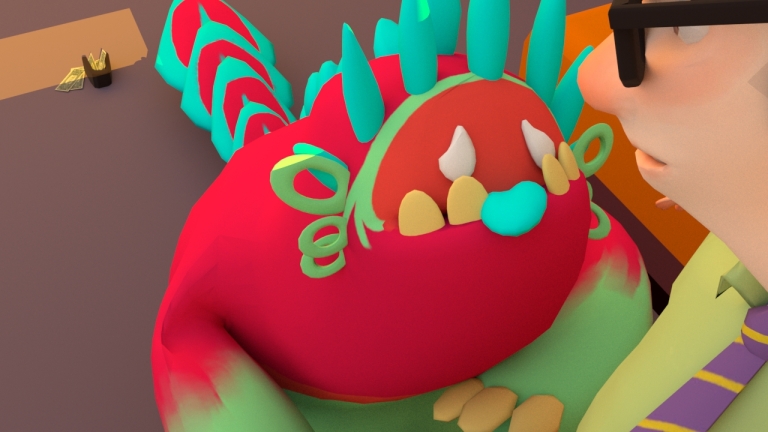
Bob’s Face:


Let’s say Bob has made Steve’s life more…. eventful

Lil rendered image of them chilling outside in the sun:

Storyboard:


Animatic:

I decided that I didn’t have enough angle variation so when towards the end, Steve decides he’s done with it and wants to leave and the closeup is on his face, he’s going to come towards the camera instead of to the side.

Sound:
The main soundtrack I plan to record will sound something like this at 0:55
List of really good songs I plan to take inspiration from:
https://www.audionetwork.com/browse/m/production-genre/film-styles/animation/results
For my soundtrack I decided to use something that resembles waltz instead, very fast paced and with lot of fast notes travelling around, to make my animation engaging and fun.
A little soundtrack test I did quickly to demonstrate the type of soundtrack I will be using. It’s not the finished soundtrack of course, it needs a lot more work.
I plan to use bass as the main riff and piano for the higher notes, and of course, match it to the animation and add more variation and dimension to the sound.
I also plan to add a clock ticking sound when Steve checks his clock, as well as Bob’s growling sounds and laughing when Steve tries to pick him up.
I will try to record all my sounds instead of taking them from the internet as I feel it adds a personal touch to the animation.
I will also add slapping/touching sounds if necessary afterwards, when Steve pushes Bob around.
At the end, when they are both in the office I will have a sound of a crowd talking, as all workers there would be interested in the big pink thing next to Steve.
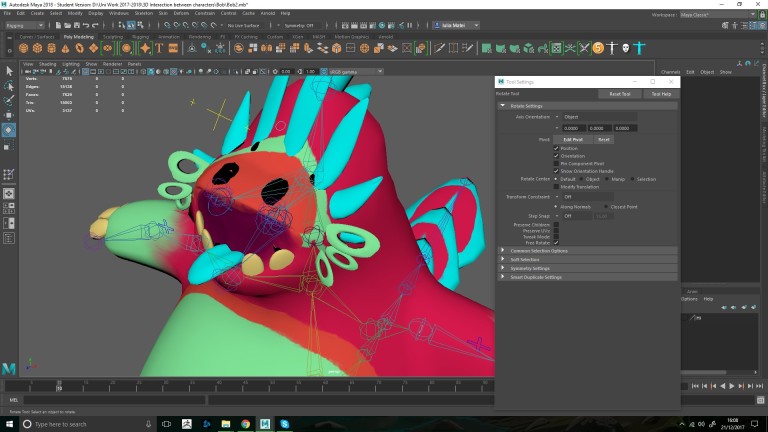
MODELLING AND TEXTURING BOB:

I wanted him to be quite high poly because last time when I animated, I didn’t have enough detail and the deformation looked dodgy. However, here Bob has bit too many polys, even for me, so I deleted some unnecessary edges to make skinning a bit easier.
Bob’s uv’s

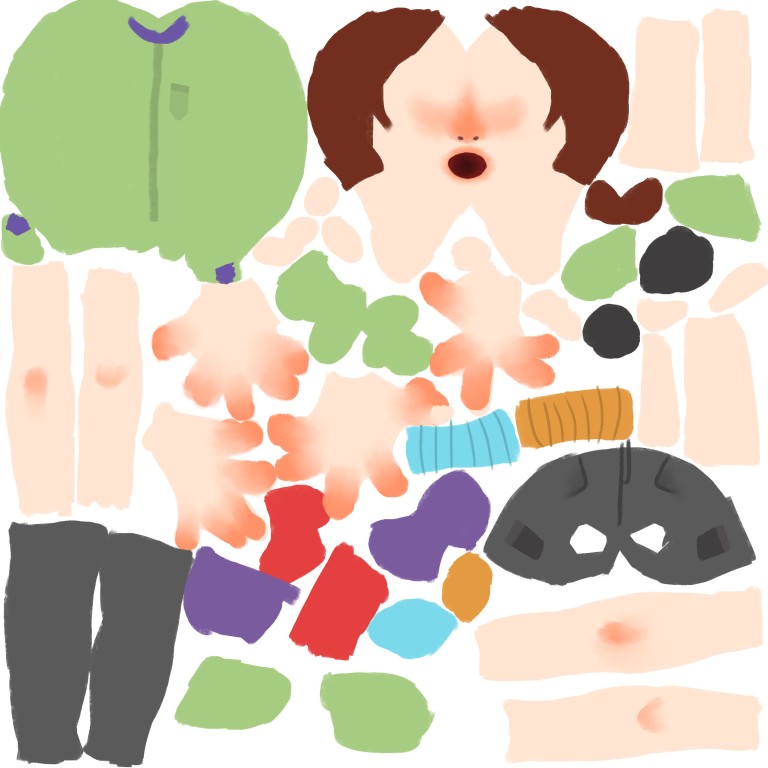
MODELLING AND TEXTURING STEVE:

I left Steve’s body quite low poly except the face which will help me create blendshapes more accurately and make the deformations feel more believable.
The ears are separate because I thought it would be easier to model them separately but I realised it would be more efficient to make them part of the face, texturing wise because that way I’d have less shaders in the scene, which makes everything more tidy and simple, less confusing. Same goes with the tie and the belt. 


Steve fully textured:

Steve’s textures.
After trying to make his shirt striped, I realised that it is nearly impossible to do it with this old-school method and it would only be possible with poly painting in z-brush or using a texturing program like substance painter or something similar. The stripes never went on straight, no matter how much I unfolded the uv’s. They would go all jagged and looking like they were traced by a 5 year old.
I didn’t want to complicate things so I chose to just change his t-shirt and give him a pocket instead which is, in my opinion, just as dorky.
RIGGING AND SKINNING STEVE:
For the skeleton, I wanted something quick and easy, but also advanced, with finder controls and toes controls, eyes controls. I could do it myself as I have done it before but I thought if I can spare some time, why not.
I found a plugin called “advanced rig 5” for maya which worked perfectly. There were some problems at first, like the skeleton adding too many joints around the spine and legs, arms and neck, also the joints being too small. But I managed to fix them.

Another thing that I had to deal with is the fact that the way this rig worked was that it referenced the mesh that I wanted rigged and created an instance of it which it would lock permanently. The lock can be seen on the left in the outliner, this blue diamond. At first I had no idea what it was but I realised it was from the rig plugin.
When I first was trying to use this plugin, I referenced the entire scene, instead of the model only so I was stuck with the lights I chose in the positions I chose. I could just hide them but I wanted my outliner to be clean and neat so I did the rig again, this time with the original mesh.
Skinning.
Since I already had done skinning on the referenced model, I tried exporting them and re-importing them to my new skeleton. However, for some reason it didn’t work, so I re-painted all the skin weights.
Making sure that the knees and elbows deform well.


I found that I don’t really need corrective shapes for my characters, everything seems o be working well from skinning only so, Steve is all done!
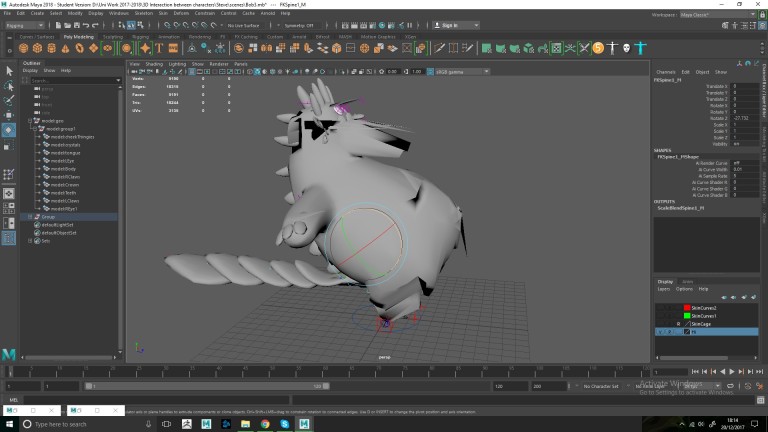
RIGGING AND SKINNING BOB:
Bob’s rig was easier as he doesn’t have fingers or toes. And also because now I was more used to the rig and how it behaves.
Only challenge was adding the tail, but the rig had an option for that too so I am very pleased with this find, it is truly a really good plugin and I recommend it to anyone!
I also added an extra joint for controlling the belly, and to help with skinning. I found out that for shapes that stick away from the spine it’s good to add an extra joint, not only to help maya decide where the skinning goes, but it would also be good in case you want to add some jiggle effect to it.

Skinning was pretty straight forward, no problems here.

Well..except few..

For some reason Bob wasn’t cooperating.
Reason for that was that my mesh wasn’t clean. Somehow, I missed a vertex, or a face that had more than 4 edges. So I cleaned up my mesh, with a maya tool that points out the flaws in your mesh and started skinning once again.
Finally, Bob is all done, including the jaw:
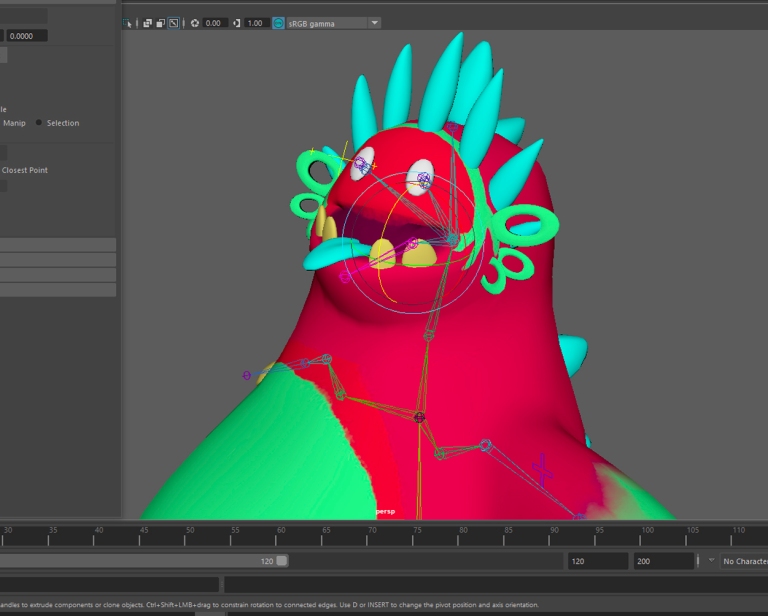
He’s a bit tanned in this picture, not sure why…
As for the set, I did few drawings because I didn’t like the grey look of the room, I needed more colour. Unfortunately, I only saved two variations:

I ended up using a different one for my animation but have these anyway.
Now onto the fun part.
I decided to try xgen hair.
Was in necessary? No. But I still wanted to do it.
XGEN:
It was a real pain, but after hundreds of tutorials, I finally made it work.
So. Let’s see the process and what I’ve learnt from all of this:
First, I created a cap, by duplicating the whole body and deleted all faces except the top of the head:

Then I added guides, set the length, shaped them and ended up with this:
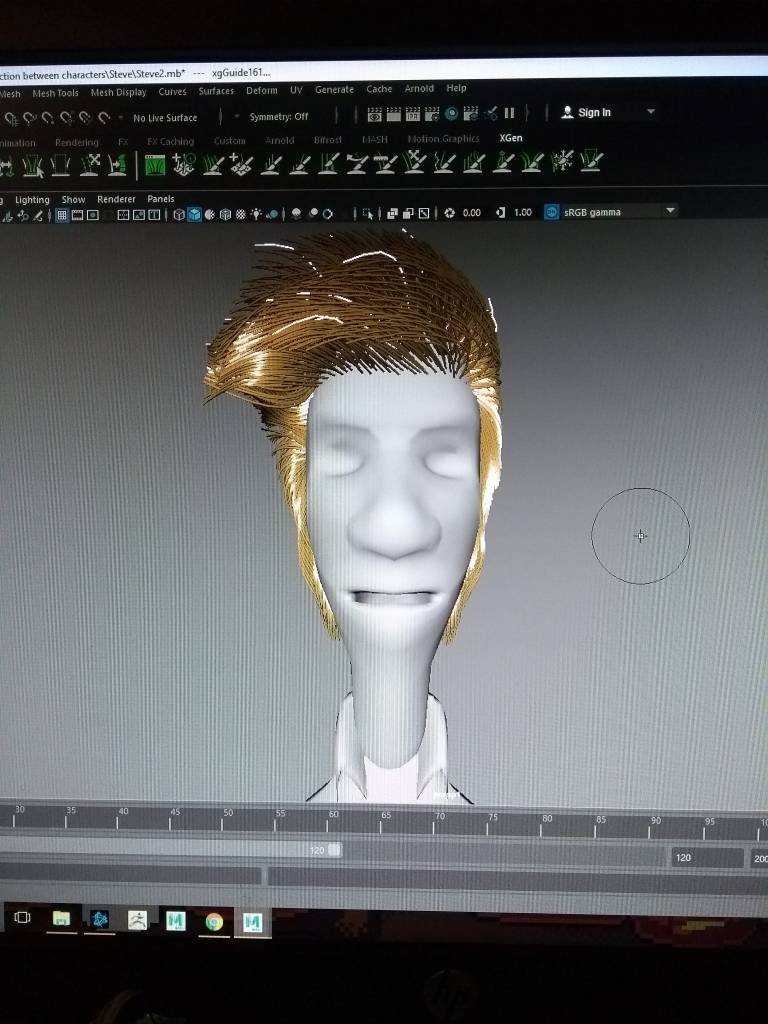
Not too shabby but not too good either. Excuse the disturbing lack of eyes.
Then I started working with modifiers, like clumping, noise, cut etc.
First time trying clumping:

Interesting look but not what I’m going for.
After adding some noise and cut, and fiddling with clumping, adding clumping within clumping to make it look more realistic, we get this:
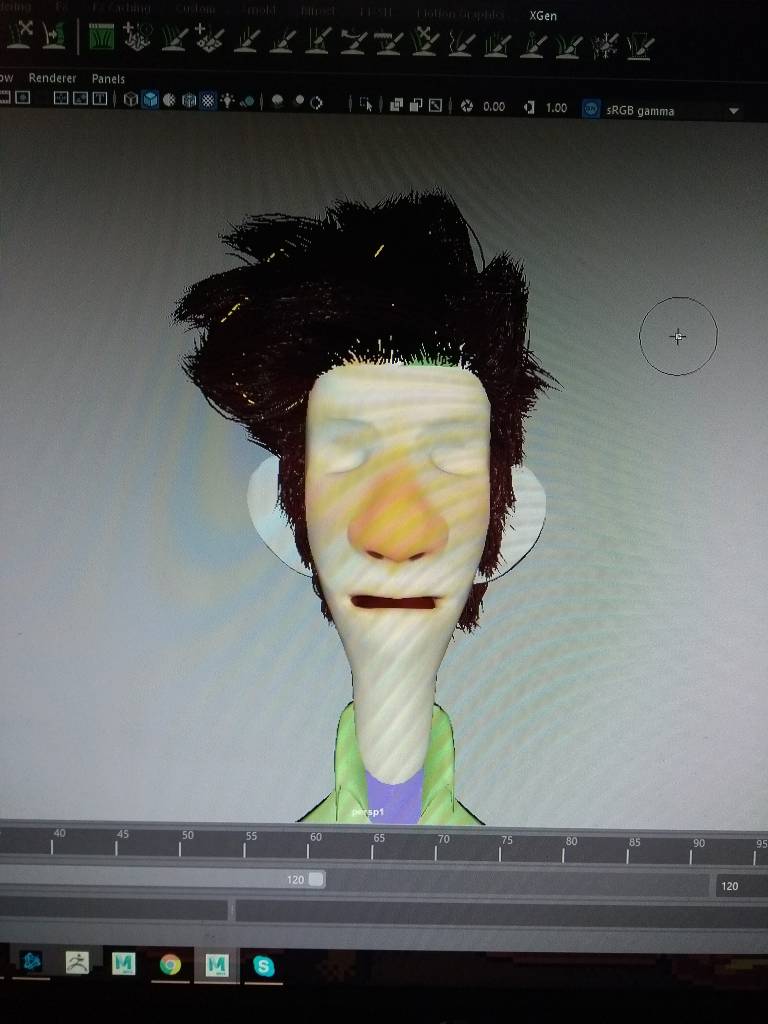
And a little render to check how it looks:

Yes. This will work.
However, xgen is very dodgy and decides to disappear. And the hair is gone.
My fault though. I learnt that xgen is very pretentious and I have to be careful how I use it, be very organised and precise. So, here is a set of rules that have to be done in order for xgen to work, both by itself but also for animation:
- Clean up history on the cap mesh, where the guides are coming out of.
- Center the pivot of the mesh
- Set the project BEFORE doing xgen because it creates files which you need in order to keep the xgen once you close the scene and open it again, otherwise it disappears or it goes bananas.
- For animation, do the xgen in a separate scene and import it ONLY after the animation is done, because otherwise, Maya will lag and crash a lot, trust me.
- When you connect the cap to the body, DON’T skin it. It will go like this and you will cry:

- Instead, parent it to the head bone, or neck bone, whichever you prefer and it will follow the movement.
- Before rendering, make sure to preview xgen at least in one of the frames, otherwise some guides won’t show in the render, and your character will look half bald, which isn’t pretty. Still not sure why it does that but just preview it and it will be alright.
- If you batch render, you have to export the xgen and tell it it will be batched rendered in the xgen menu.
It was quite a ride but I finally feel comfortable with xgen and I am happy that I could make it work.
Now onto the animation itself.
ANIMATING:
Starting with the set:

I added a light in each window, set the intensity quite high because I wanted a strong morning sun coming from the windows.
Kept everything else quite simple, I reused a lot of textures, for example the floor texture is shared by the windows too, or the clock texture is shared by the bed sheets.
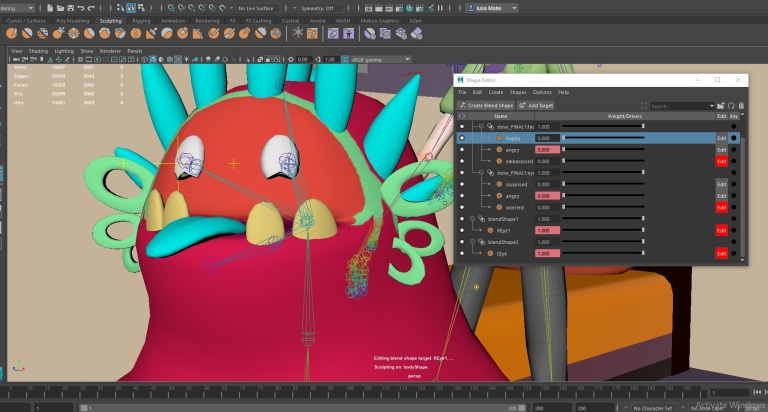
Blend shapes:
I only needed few expressions, mostly angry for Steve and happy for Bob.


When animating, I was looking at two influences that I really look up to. One of them is king’s quest game, where the animations are very exaggerated, very jumpy and sudden. Here’s an example:
Whisper has the most exaggerated movement in the game and I really love it, it almost mimics the movement of a rooster with snap movements. His personality is completely opposite from my character’s but I will adapt this style of animation to match my own.
And second influence is overwatch animations, just because again, they are very effective through their exaggeration.
NCLOTH:
Ever since the beginning I decided that I wanted to try cloth simulation. I have dwelled into it a bit but never fully understood it. So I thought the perfect opportunity would be starting with something small, like Steve’s tie.

Surprisingly, it wasn’t that hard to do. All I had to do was duplicate the tie (keep the knot in place), make the tie an ncloth, the mesh a passive collider, and add the knot as a constraint to the very top vertices of the tie to make the tie attached to the knot. I also doubled the polys on the tie for smoother deformations.
Just because it follows the movement, it doesn’t mean it is doing it right though. The tie was floating around not acting naturally. So I went in and worked with the settings to make it more believable. I found that the most important setting is gravity. I set it to 1000 and it already made the tie act almost perfectly. Some things like self collide, wind, weight, air density, dampness and few more helped as well but the biggest difference was made by gravity.
One thing that I learnt, is that again, just like xgen, make nCloth simulations at the very end when the animation is done, and keep a clean animation file with no xgen or nCloth just in case something goes wrong.
After rendering, I put everything in After Effects. I realised one thins though.
I forgot to model a chair.
Because my time was limited, and rendering had already taken most of the week, I decided a simple solution than rendering again would be drawing the chair in photoshop and then replace it as a png on top of the scene in after effects.

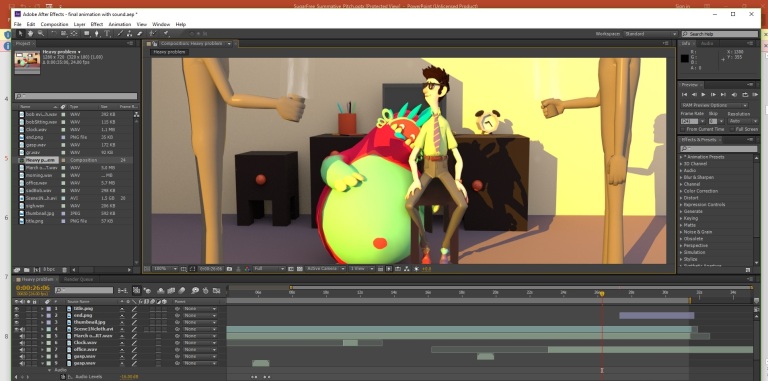
To tie everything together, I added a layer of dust particles on top of everything, and slightly corrected the colour with colour correction to make everything a bit more vibrant and bright.
I also added a coffee steam coming out of the two workers’ mugs.
Source for the effects:
I also added a few more still image frames in between movie footage, like when Steve looks at Bob, and the reason for that is because I did not want to render 5-10 images of Steve being still, looking at Bob. It would be a waste of time. So instead, I decided I would do that later in After Effects.
Time for sounds:
- 2 ambience sounds: morning in the city and office at the end.
- One soundtrack: March of the spoons
- Character sounds: Steve sighing, gasping. Bob crying, laughing.
- World sounds: Bob sitting, clock ticking.

Added a beginning and end title, drawn in photoshop and animated in after effects:


I decided to post my animation online early, a week before the deadline to get some feedback from people and see what needs to be improved. The main issue is that the ending is unclear, it’s not obvious that they’re in an office and that is mainly because of the manequins I used. They are not indicative enough of an office and people confused them with manequins and the office with Steve’s room.
So I plan to change the outfits of the manequins with the same method I used for the chair. Paint over in photoshop and then import as a png on top of the movie.
Things I have learnt:
– Keep the outliner clean (I wasn’t using it before)
– Xgen and how to make it work
– nCloth simulations
– Rendering settings
– Keep shaders simple and clean, as little of them as possible
– How to animate anticipation and sudden, sharp movements, as well as exaggerating.
– Staying organized and setting a project
– Keeping animation scenes organized
Things I plan to improve (or wish I had done better)
– Lighting. I plan to look into how to make a scene feel realistic through lighting. I feel
like my lighting in this animation is basic, simple, nothing special. I plan to change
that in the future.
– Shaders. I want to see how I can manipulate materials better, to make them react to
the environment more, and make everything feel and look more believable
